Problem: You wish to have an external sender message
Solution:
Microsoft recently introduced the option of creating one internally rather than through rules:
(h/t alitajran.com)
Add tag to external emails in Microsoft 365 for extra security
You like to secure the infrastructure, and one of the places to have additional security is email. Users click too fast on hyperlinks or attachments, and it’s excellent to make them aware of double-checking the email because it’s sent from an external sender.
Microsoft listened and added a new feature in Microsoft 365 – Exchange Online. From now on, we can add a tag for external emails. It’s a welcoming new feature and only available for Exchange Online. In this article, you will learn how to enable the external tag feature.
Table of contents
Why you should enable external tagging
Why do you want to add a tag for external received email messages? Even that we have Exchange Online Protection or other spam filters, it’s known that you can’t completely protect the organization from spyware, malicious links. User awareness is important, and that’s what the external tag feature will do.
Microsoft is aware that even if you enable SPF, DKIM, and DMARC to prevent phishing and email spam, it’s not enough. That’s why they created a new PowerShell cmdlet for Exchange Online to enable the protections against spam & phishing threats from external senders. This will be achieved by presenting a new tag on emails called “External”.
It will show in:
Suppose your organization already uses mail flow rules (also known as transport rules) to add text to the subject line of messages from external senders. In that case, you should disable those rules before you enable this feature to avoid duplication.
Connect to Exchange Online PowerShell
The only option to enable the tag for external email messages is with Exchange Online PowerShell. There is no option through the Microsoft 365 Exchange admin center.
Run Windows PowerShell as administrator and connect to Exchange Online PowerShell.
PS C:\> Connect-ExchangeOnlineCopyhttps://5c2b085f4d0e7b26837d10b71ee18a6f.safeframe.googlesyndication.com/safeframe/1-0-38/html/container.html
Enable external email tag
Enable external sender identification in supported versions of Outlook. Run the Set-ExternalInOutlook cmdlet.
PS C:\> Set-ExternalInOutlook -Enabled $trueCopy
Now that it’s enabled, you can verify by running the Get-ExternalInOutlook cmdlet.
PS C:\> Get-ExternalInOutlook | Format-Table

RunspaceId                           Identity                             Enabled AllowList
----------                           --------                             ------- ---------
262c8cb4-da7e-47b0-bcb4-6ce1569061b6 fe15bfe6-36b2-4c9d-bf42-51b995f8e9af    True {}
After you enable the cmdlet, it can take between 24-48 hours before the users see the external tag from received external emails.
Add domain to allow list
Don’t you want to add an external tag to a domain or multiple domains? Add the domains to the allow list.
PS C:\> Set-ExternalInOutlook -AllowList @{Add="contoso.com", "microsoft.com"}Let’s see how it looks.
PS C:\> Get-ExternalInOutlook | Format-Table Identity, Enabled, AllowList

Identity                             Enabled AllowList
--------                             ------- ---------
fe15bfe6-36b2-4c9d-bf42-51b995f8e9af    True {contoso.com, microsoft.com}
Remove domain from allow list
Do you want to remove the domain or domains from the allow list?
PS C:\> Set-ExternalInOutlook -AllowList @{Remove="contoso.com", "microsoft.com"}Exchange Online external tag enabled
After we set the external tagging feature, we had to wait for 48 hours before the external tag feature did show up. The new emails that arrive are automatically tagged. Older emails that you have do not get the external tag.
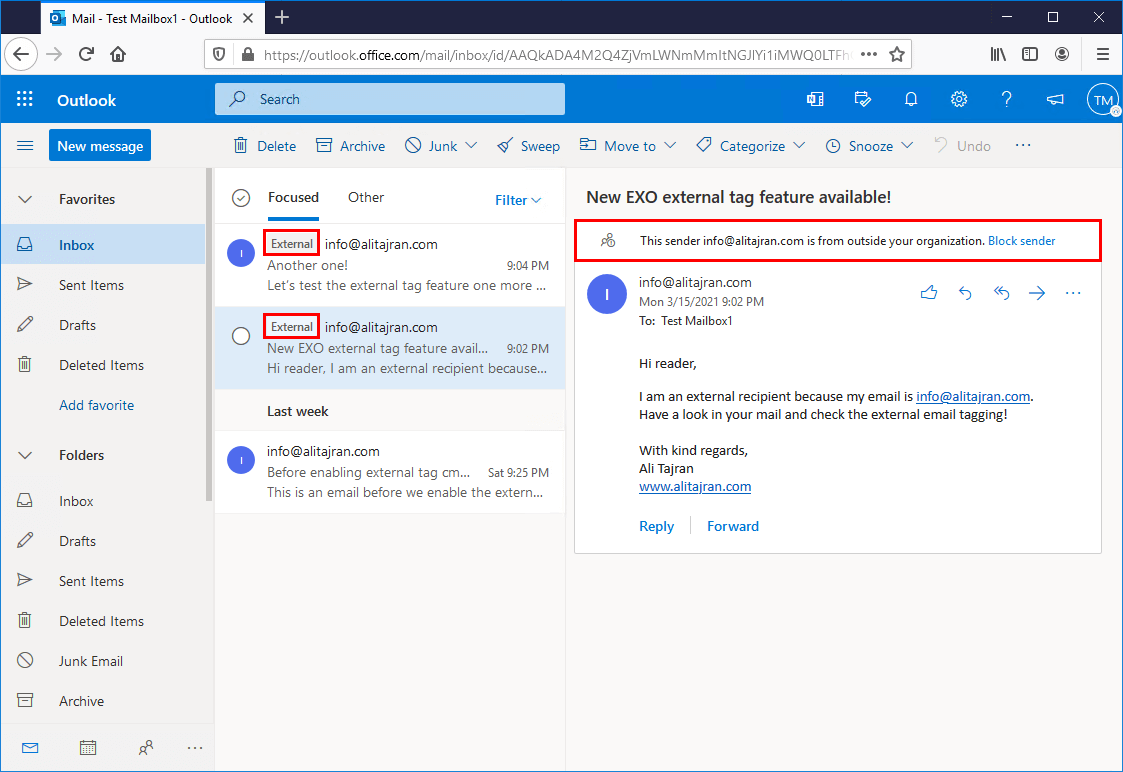
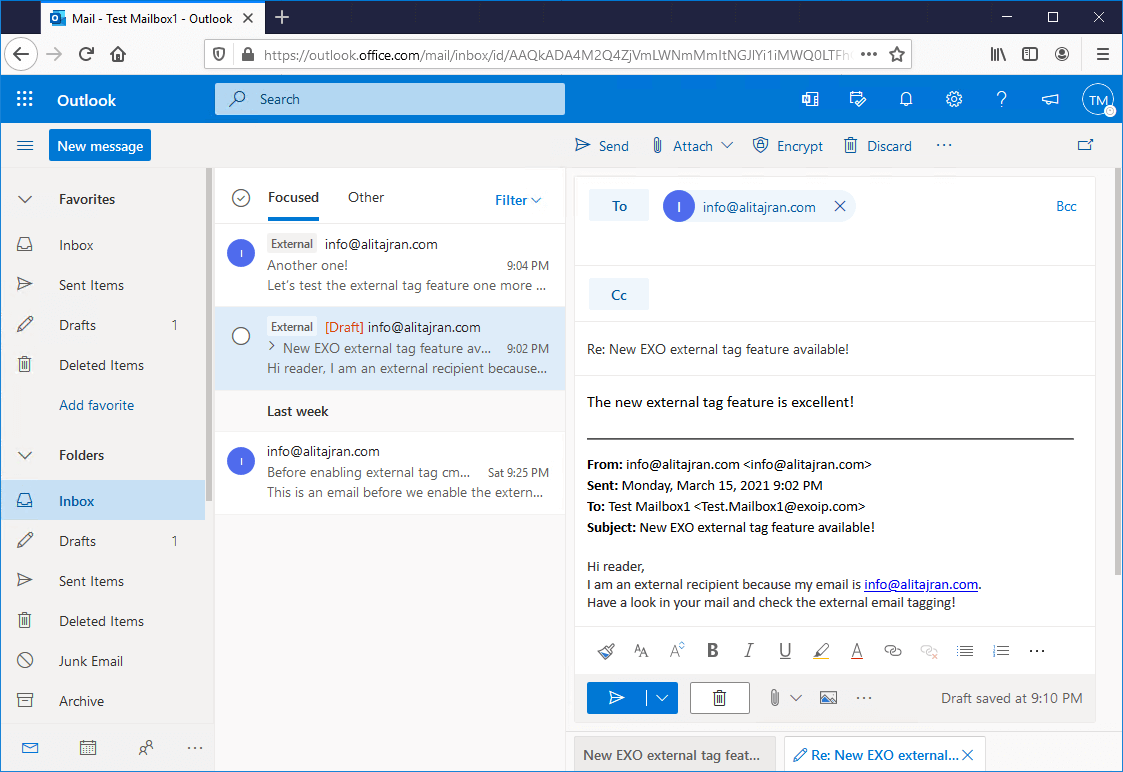
Reply to an email, and the external tag will not show up in the email message. The sender does not know you have external tagging enabled, which is excellent.
Exchange Online external tag not working
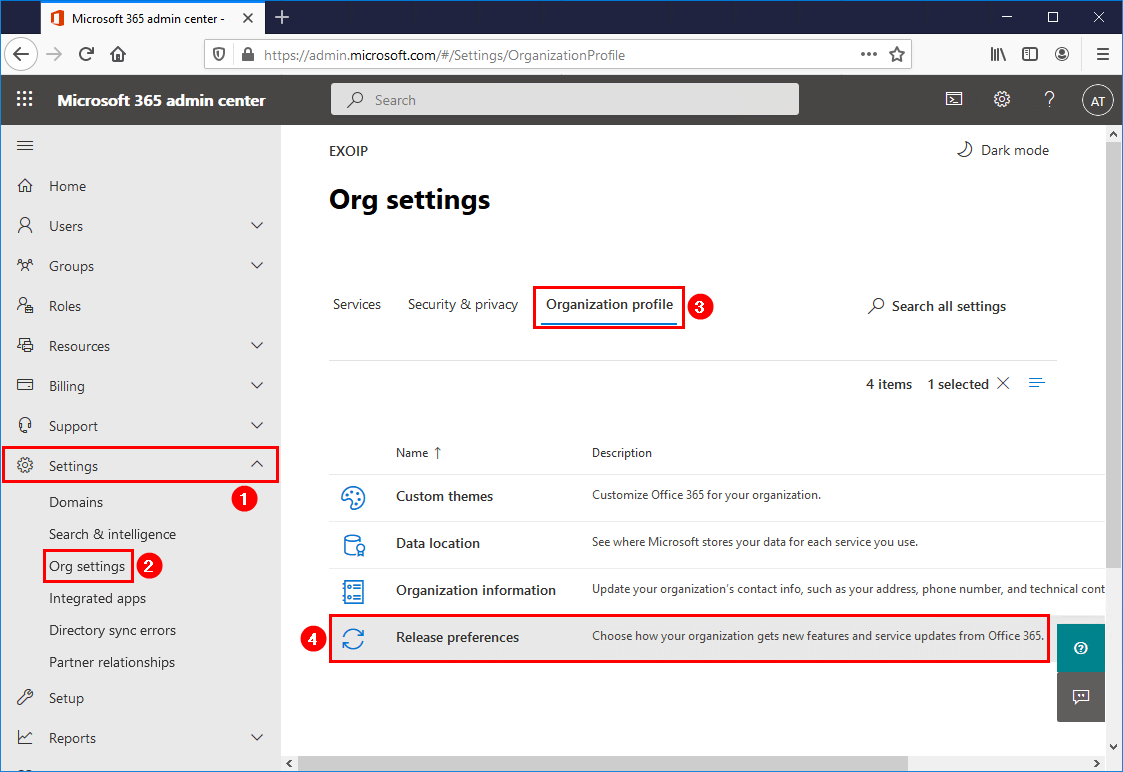
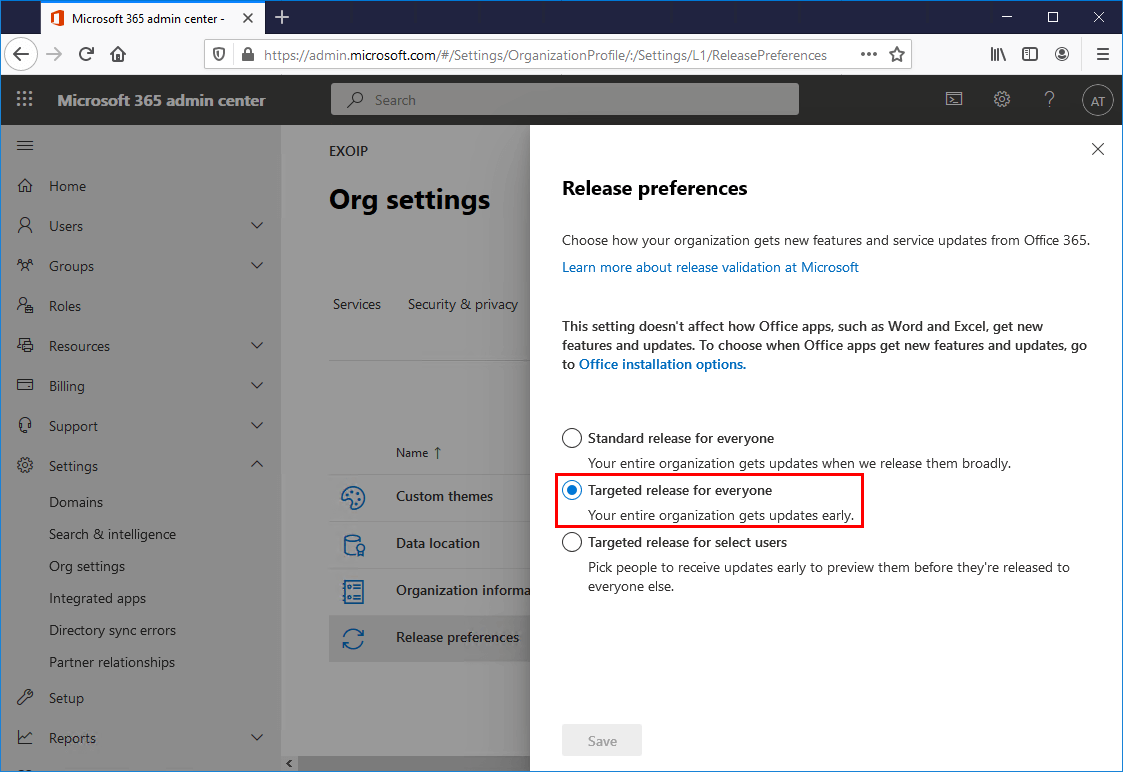
Because it’s a new feature, this can take time before it’s available in your Microsoft 365 tenant. To speed that up, you can set up the targeted release preferences in Microsoft 365.
Sign in to Microsoft 365 admin center. Go to Settings > Org settings > Organization profile > Release preferences.
Select Targeted release for everyone and click on Save.
That’s it! Did you enable the external tag feature in Exchange Online – Microsoft 365?
Read more: Save sent items in shared mailbox with PowerShell »
Conclusion
In this article, you learned how to add a tag to received external emails in Exchange Online – Microsoft 365 for extra security. Spammers will try every way possible to get that mail in your inbox. Using this new and excellent feature by Microsoft will make the users aware that the email is coming from outside the organization.
I recommend enabling this feature on every Microsoft 365 tenant. Don’t forget that the tag feature only is available for Exchange Online, and this will not work for Exchange on-premises. We may see this feature in Exchange on-premises, but there are no words about that yet.
Did you enjoy this article? You may also like Assign Office 365 licenses with Azure group-based licensing. Don’t forget to follow us and share this article.